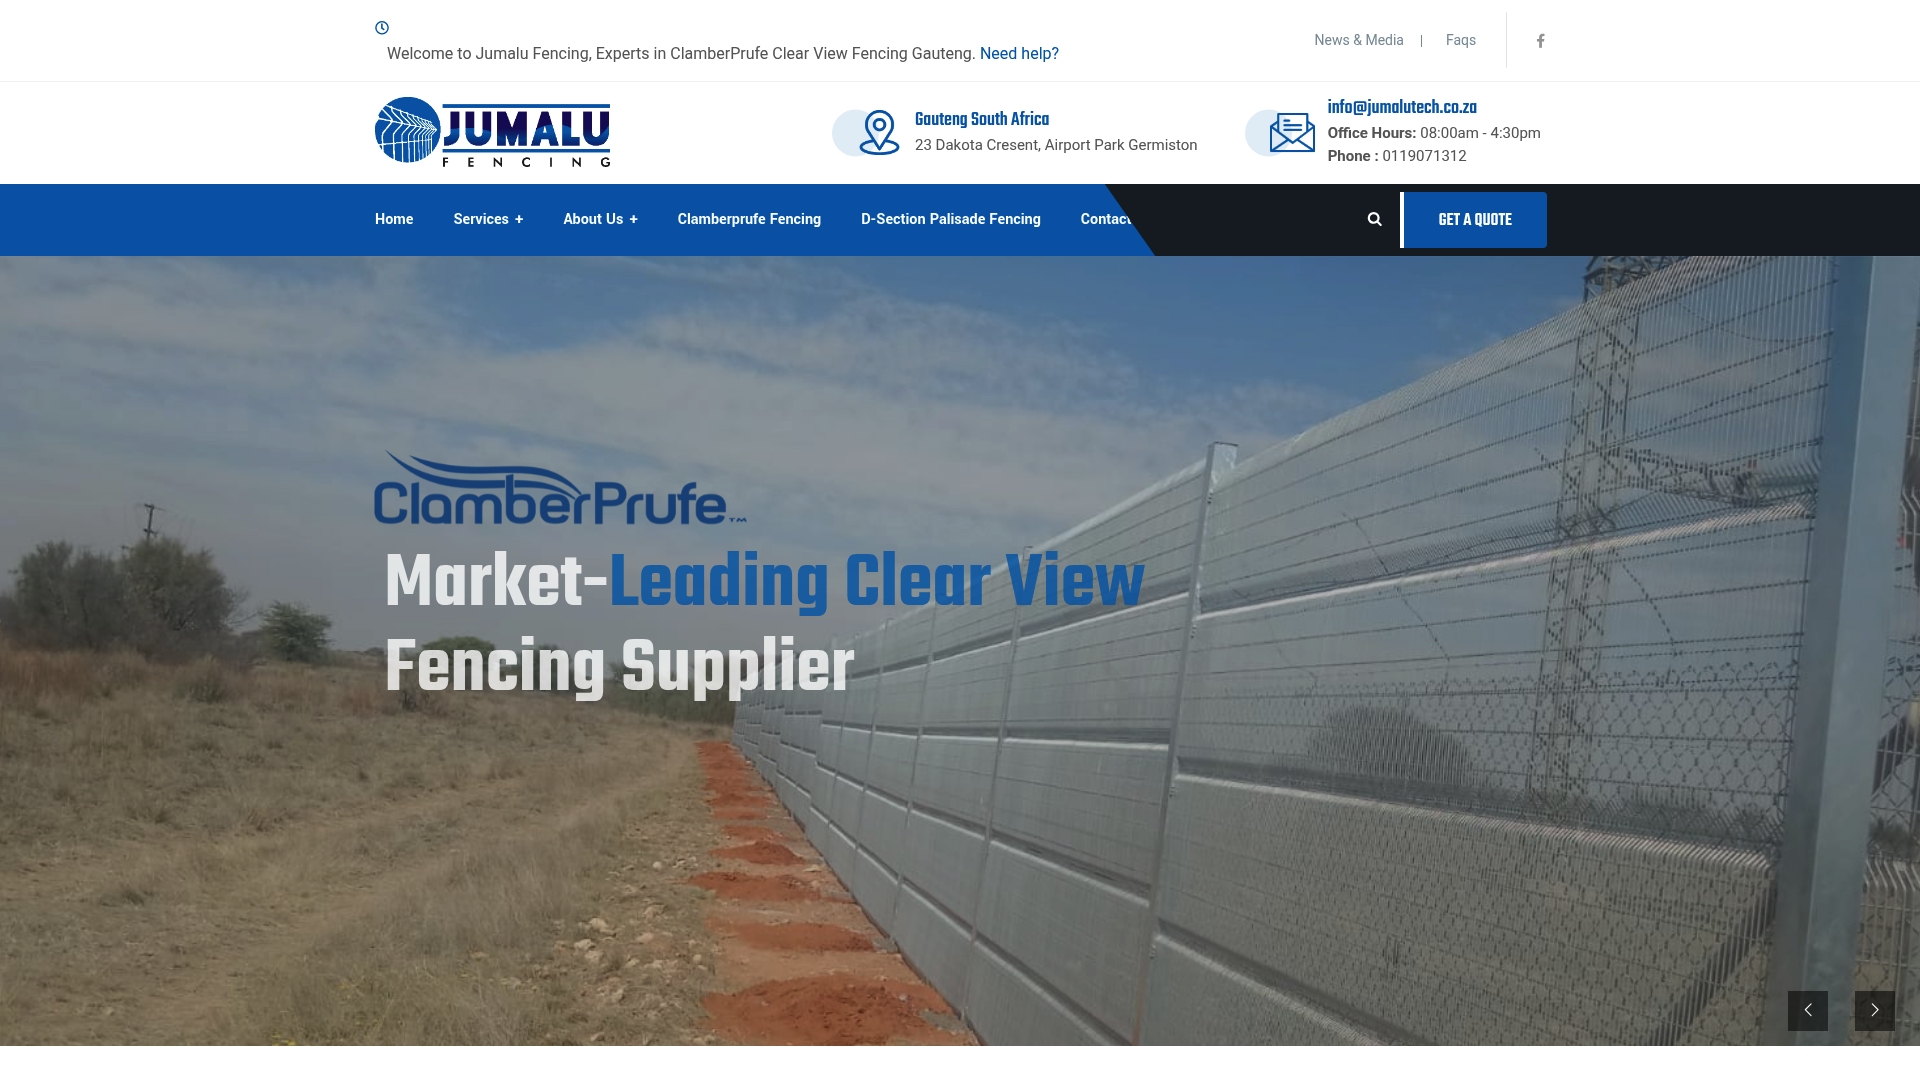
More than 60 percent of security breaches happen due to poorly installed perimeter fences. Protecting your property starts long before the first post goes in the ground. Every step in the installation process affects the strength and reliability of your barrier. This guide breaks down each essential phase, giving you clear, practical advice to help you build a security fence that stands strong against threats and stays compliant with local regulations.
Table of Contents
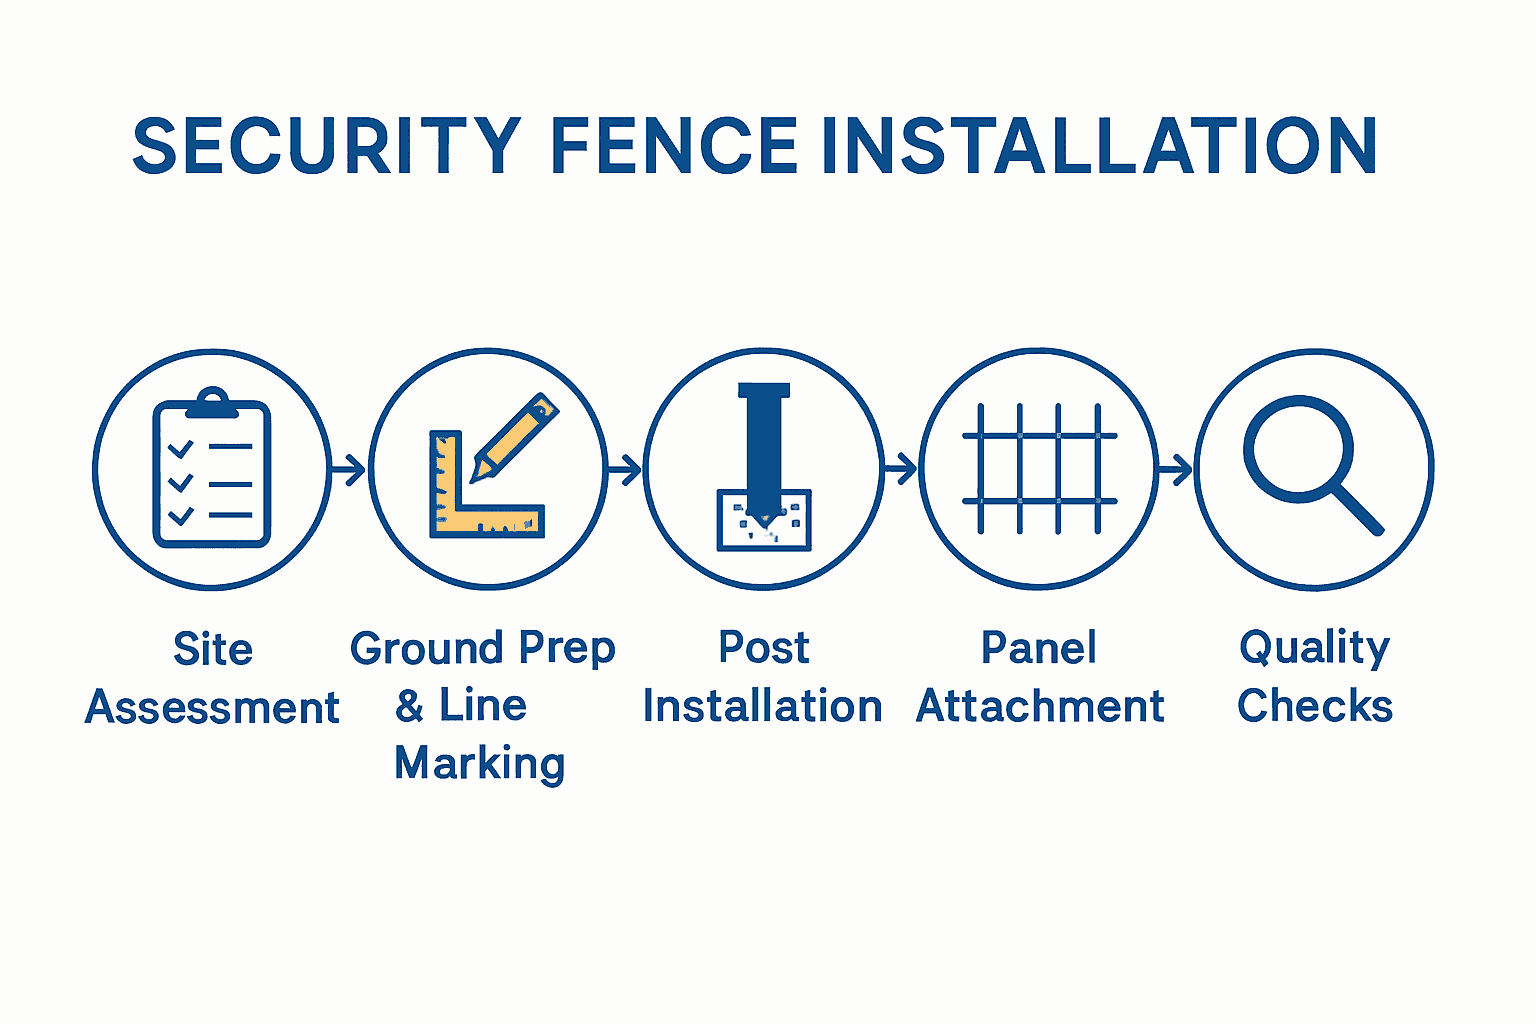
- Step 1: Assess Site And Confirm Requirements
- Step 2: Prepare Ground And Mark Fence Line
- Step 3: Install Fence Posts Securely
- Step 4: Attach Security Fence Panels Accurately
- Step 5: Conduct Rigorous Quality And Security Checks
Quick Summary
| Key Point | Explanation |
|---|---|
| 1. Conduct a thorough site assessment | Evaluate your property’s unique characteristics and security needs before fencing to ensure effectiveness and compliance. |
| 2. Prepare and mark your fence line carefully | Clear the area, mark the fence line accurately, and use markers to ensure straight alignment for successful installation. |
| 3. Securely install fence posts | Dig posts to the correct depth, use concrete for stability, and ensure vertical alignment for a strong foundation. |
| 4. Accurately attach security fence panels | Position panels correctly, check for alignment, and secure connections to enhance both security and aesthetics. |
| 5. Perform rigorous quality checks | Inspect the entire fence for stability and potential vulnerabilities to ensure your security installation meets safety standards. |
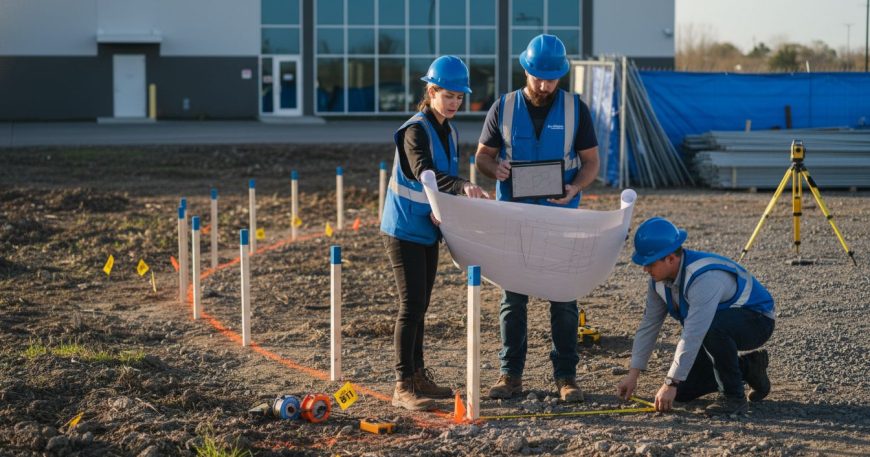
Step 1: Assess Site and Confirm Requirements
Before installing a security fence, a comprehensive site assessment is crucial to ensure you create a robust protection system tailored to your specific environment. This initial step involves carefully evaluating your property’s unique characteristics, security needs, and potential installation challenges.
Begin by thoroughly examining your property’s perimeter, measuring precise distances and noting any terrain variations that might impact fence installation. Pay close attention to ground conditions terrain slopes, soil composition, and potential underground utilities that could interfere with your fencing project.It is critical to understand legal compliance requirements during this assessment. In South Africa, for instance, certain security installations like electric fences require a valid Certificate of Compliance (COC) to ensure safety standards are met.
During your site assessment, document specific requirements such as required fence height, potential obstacles, access points, and desired security zones. Sketch a rough property layout noting key elements like existing structures, vegetation, and potential mounting points for your security fence. This preliminary documentation will serve as a critical reference during subsequent installation stages and help your installation team understand the precise scope of work.
Pro Tip: Always consult local municipal regulations and obtain necessary permissions before commencing your security fence installation to avoid potential legal complications.
Once you have completed a thorough site assessment, you will be well prepared to move forward with selecting appropriate fencing materials and developing a precise installation strategy.
Step 2: Prepare Ground and Mark Fence Line
With your site assessment complete, it is time to prepare the ground and precisely mark your fence line to ensure a successful security fence installation. This critical stage sets the foundation for a robust and accurate perimeter protection system.
ClearView fencing installations demand careful ground preparation and precise fence line marking to guarantee optimal security and aesthetic appeal. Begin by clearing the designated area of debris vegetation and potential obstructions. Use spray paint or wooden stakes with string to mark your exact fence line measuring carefully to ensure straight alignment and consistent spacing. Take time to verify measurements multiple times checking both horizontal and vertical dimensions to prevent future installation complications.
As you mark the fence line, consider underground utilities drainage systems and potential landscape features that might impact your installation. You will want to create temporary markers every few meters to guide your installation team and maintain consistent alignment. Ensure your markers are bright visible and securely placed to withstand wind and potential weather conditions.
Pro Tip: Rent or borrow professional surveying equipment like laser levels to guarantee absolute precision during your fence line marking process.
Once you have thoroughly prepared the ground and marked your fence line with precision you will be ready to move forward with material selection and foundation preparation for your security fence installation.
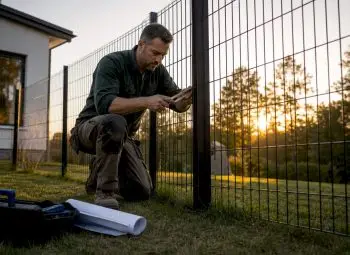
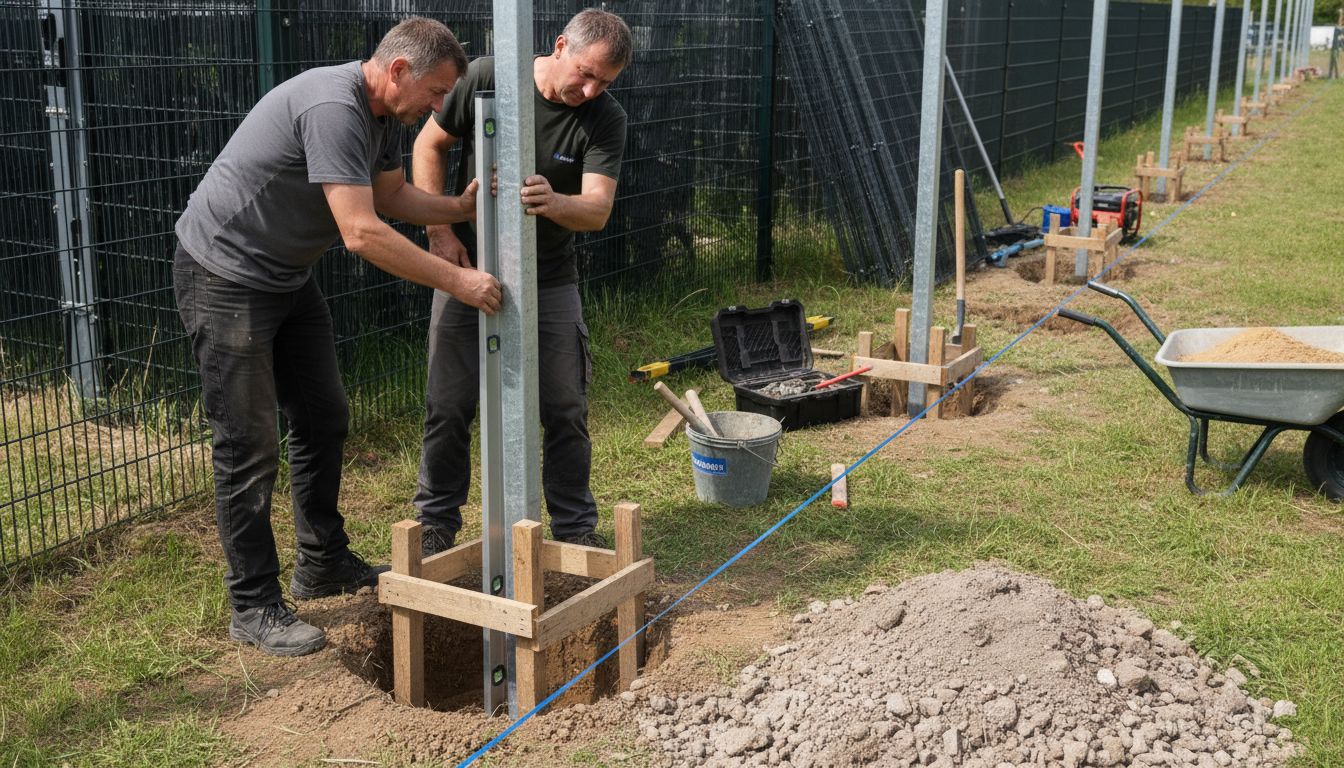
Step 3: Install Fence Posts Securely
With your fence line meticulously marked, you are now ready to tackle one of the most crucial stages of security fence installation: securely placing fence posts that will form the backbone of your perimeter protection system. This step requires precision careful planning and strategic implementation to ensure long term stability and performance.
According to thehandymanjohannesburg, the installation of ClearView fencing demands secure placement of fence posts as a vital component to guarantee the fence’s longevity and security effectiveness. Begin by digging post holes approximately 600 millimeters deep ensuring each hole is wider at the bottom to create a stable foundation. Use a post hole digger or mechanical auger for consistent depth and uniform hole dimensions. For each post location verify vertical alignment using a spirit level and temporarily brace the posts to maintain perfect positioning.
Prepare concrete mix with the appropriate water ratio and carefully pour it around each post ensuring complete coverage and eliminating air pockets. Allow sufficient curing time typically 24 to 48 hours before applying any lateral pressure or attaching fence panels. Consider environmental factors like soil composition ground moisture and potential frost lines which can impact post stability and concrete setting.
Pro Tip: For added durability apply a waterproof sealant to the base of wooden posts and consider using galvanized metal post shoes to prevent ground moisture deterioration.
Once your fence posts are securely set and the concrete has fully cured you will be ready to proceed with attaching your chosen fencing panels and completing the next stage of your security fence installation.
Step 4: Attach Security Fence Panels Accurately
With your fence posts securely installed you have reached a critical phase of your security fence installation: attaching fence panels with precision and care. This stage determines the structural integrity visual appeal and overall protective capability of your perimeter barrier.
According to thehandymanjohannesburg, accurate attachment of ClearView fence panels is fundamental to the installation process where proper alignment and securing of panels directly contribute to the fence’s overall effectiveness and appearance. Begin by carefully positioning each panel between the installed posts ensuring they are level and uniformly spaced. Use robust mounting brackets or specialized clips designed specifically for your fence type checking that each connection point is tight and secure. Work systematically from one end of the fence line to the other maintaining consistent alignment and avoiding any potential gaps or misalignments that could compromise security.
Carefully inspect each panel connection verifying that the panels are firmly attached and create a seamless continuous barrier. Pay special attention to corner sections and areas with potential terrain variations where additional reinforcement might be necessary. Use high quality galvanized fasteners and consider applying weatherproof sealant at connection points to prevent future corrosion and maintain the fence’s structural durability.
Pro Tip: Use a laser level during panel installation to guarantee absolute horizontal alignment and prevent visual irregularities that could indicate potential structural weaknesses.
Once you have meticulously attached all security fence panels you will be ready to move forward with final adjustments and finishing touches to complete your perimeter protection system.
Step 5: Conduct Rigorous Quality and Security Checks
With your security fence panels securely attached you have reached the final critical stage of ensuring maximum protection and compliance. This phase involves comprehensive quality and security checks that will validate the integrity and effectiveness of your entire fencing installation.
According to tdmi, conducting rigorous quality and security checks is mandatory to obtain a valid Certificate of Compliance especially for electric fencing installations. Begin by systematically inspecting every component of your fence starting with post stability and panel alignment. Test each connection point for tension and strength ensuring no panels can be easily manipulated or removed. Verify that all mounting hardware remains tight and that there are no visible signs of structural weakness or potential breach points.
Carefully examine the entire fence perimeter for consistency checking vertical and horizontal alignment using precision measuring tools. Look for any potential vulnerabilities such as uneven ground contact points gaps between panels or areas where additional reinforcement might be necessary. Pay special attention to corners intersection points and areas with complex terrain where security could potentially be compromised.
 Assess the overall structural integrity considering factors like material quality weatherproofing and resistance to potential external forces.
Pro Tip: Document your quality checks with detailed photographs and measurements creating a comprehensive record that can be used for future maintenance and potential certification processes.
Once you have thoroughly completed your quality and security checks you will have successfully created a robust perimeter protection system designed to provide maximum security for your property.
Enhance Your Property Security with Expert Fence Installation
Installing a security fence is not just about placing posts and panels. It requires careful site assessment, precise ground preparation, and rigorous quality checks to create a robust and reliable barrier that protects what matters most. If you are aiming for maximum protection that combines anti-climb features and clear visibility, addressing challenges like soil conditions and legal compliance is essential to avoid costly errors or insecure boundaries. Jumalu Tech specialises in high-quality security fencing solutions designed to overcome these hurdles while preserving your property’s aesthetic appeal.
Our team expertly manages every step from secure post installation to accurate fence panel attachment. Discover how our Clearview Fence Installation – Jumalu Fencing service delivers clear sight lines without compromising security. Complement your perimeter with our Gate Manufacturing – Jumalu Fencing solutions for controlled access points that match your fence’s strength. Explore additional options like Mesh Panel Fencing – Jumalu Fencing tailored for varied security needs.
Secure your perimeter today with Jumalu Tech experts who understand the critical details explained in the installation process. Don’t wait until vulnerabilities appear. Visit jumalutech.co.za to get a personalised quote and take the first step towards uncompromising security you can trust.
Frequently Asked Questions
What are the first steps in the security fence installation process?
The first step is to assess your site and confirm requirements. Conduct a detailed evaluation of your property’s perimeter and identify specific security needs, including fence height and potential obstacles. Document your findings to guide the installation.
How do I prepare the ground before installing a security fence?
To prepare the ground, clear the designated area of debris and vegetation, then mark the fence line using stakes or spray paint. Ensure you have straight alignment and proper spacing by measuring multiple times before proceeding with fence post installation.
How deep should I dig post holes for a security fence?
Dig post holes approximately 600 millimeters deep for stability. Make sure each hole is wider at the bottom to support the post better, which will help ensure the fence’s long-term durability.
What should I do after attaching the security fence panels?
After attaching the panels, conduct thorough quality and security checks. Inspect the alignment and stability of posts and panels, ensuring all connections are tight and secure to maximize the fence’s protective capabilities.
How can I ensure my security fence meets legal compliance?
Consult local regulations during your site assessment to understand any compliance requirements. For electric fences, obtaining a valid Certificate of Compliance is essential; ensure all installations adhere to safety standards to avoid legal complications.
What maintenance steps should I follow after installing a security fence?
After installation, document the quality checks and periodically inspect the fence for any signs of wear or damage. Regular maintenance, such as tightening connections and checking for structural weaknesses, will help extend the lifespan and efficacy of your security fence.