Did you know that poorly planned fencing can increase installation costs by up to 30 percent in South Africa? Thoughtful preparation is critical for building a secure and durable industrial fence. By understanding site conditions, mapping boundaries, and following careful steps, you set the stage for a hassle-free project. Avoiding costly mistakes starts with the right knowledge and a methodical approach that saves both time and money.
Table of Contents
- Step 1: Assess Site Requirements And Plan Layout
- Step 2: Prepare Ground And Mark Fence Lines
- Step 3: Install Fence Posts Securely
- Step 4: Attach Mesh Panels Or Fencing Material
- Step 5: Verify Alignment And Structural Integrity
- Step 6: Finish Installation And Clean Up Site
Quick Summary
| Key Point | Explanation |
|---|---|
| 1. Conduct a thorough site assessment | Assess terrain, existing structures, and access points to inform fence design and installation costs. |
| 2. Ensure compliance with local regulations | Review safety standards like SANS 10222-3:2023 and zoning laws before proceeding with your installation. |
| 3. Use proper materials for stability | Select hot-dip galvanized posts for durability, and dig holes deep enough for solid anchoring. |
| 4. Check alignment and structural integrity | Use tools like laser levels and calipers to verify precise panel alignment and spacing before finishing. |
| 5. Document installation process thoroughly | Take photos and maintain records of your installation to support future maintenance and warranty claims. |
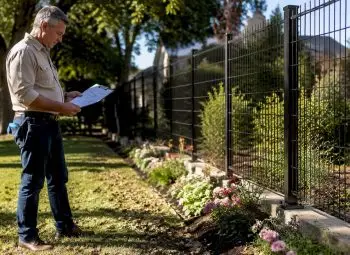
Step 1: Assess site requirements and plan layout
Designing an industrial fence requires strategic planning and careful evaluation of your specific site conditions. This initial assessment will determine the complexity and approach for your entire fencing installation project.
Start by thoroughly examining your property’s physical characteristics. According to research from construction experts in South Africa, site conditions significantly impact labour costs and installation complexity. Walk the entire perimeter and document terrain variations, existing structures, accessibility points, and potential obstacles.
Measure the precise boundaries and note any slopes, rocky areas, or uneven ground that might complicate fence placement. Pay special attention to potential access points and areas requiring extra security reinforcement. Sketch a rough site map highlighting these key features to help visualize your fencing strategy.
Here’s a summary of key considerations during your site assessment:
| Site Feature | What to Check | Why It Matters |
|---|---|---|
| Terrain & Ground | Slopes Rocks Uneven areas |
Affects installation complexity |
| Access Points | Gates Entrances Escape routes |
Identifies security priorities |
| Existing Structures | Buildings Walls Utilities |
Impacts fence routing |
| Legal & Compliance | SANS 10222-3:2023 Zoning Local regs |
Ensures lawful installation |
| Security Hotspots | Vulnerable zones Blind spots |
Guides reinforcement strategy |
| Documentation | Photos Site sketches |
Provides reference for installers |
Careful attention must be given to legal compliance. As outlined in the updated SANS 10222-3:2023 standard, your fence design must meet specific safety and installation requirements. Consider consulting local building regulations and potential zoning restrictions before finalizing your layout.
Pro Tip: Photograph your site from multiple angles to create a comprehensive reference for your installation team.
Your next step will involve selecting appropriate materials and determining the specific fence configuration based on these initial site assessments. Detailed preparation now will save significant time and resources during the actual installation process.
Step 2: Prepare ground and mark fence lines
With your site assessment complete, the next crucial phase involves precise ground preparation and accurate fence line marking. This foundational step ensures your industrial fence will be structurally sound and professionally installed.
According to research from construction experts, proper site preparation is critical for efficient fence installation and can significantly influence overall labour costs. Begin by clearing the entire fence line perimeter of vegetation, debris, and potential obstructions. Remove rocks, tree roots, and any uneven ground that might interfere with your fence placement.
Use landscape marking spray or string lines to create exact boundary indicators. Measure multiple times to confirm precision before beginning any ground work. For security fences like the 358 design, you have options for ground termination. Research suggests you can either terminate panels at finished ground level or extend them 300mm below ground in a carefully prepared trench.
If choosing underground installation, dig a consistent trench and consider backfilling with concrete, pea gravel, or compacted fill to enhance overall stability. This method provides additional anchoring and prevents potential ground movement from compromising your fence structure.
Pro Tip: Always call local utility services to mark underground cables and pipes before digging to avoid potential damage.
With your ground prepared and lines marked, you are now ready to move forward with post installation and initial fence framework assembly. Accurate preparation now will ensure smoother subsequent installation steps.
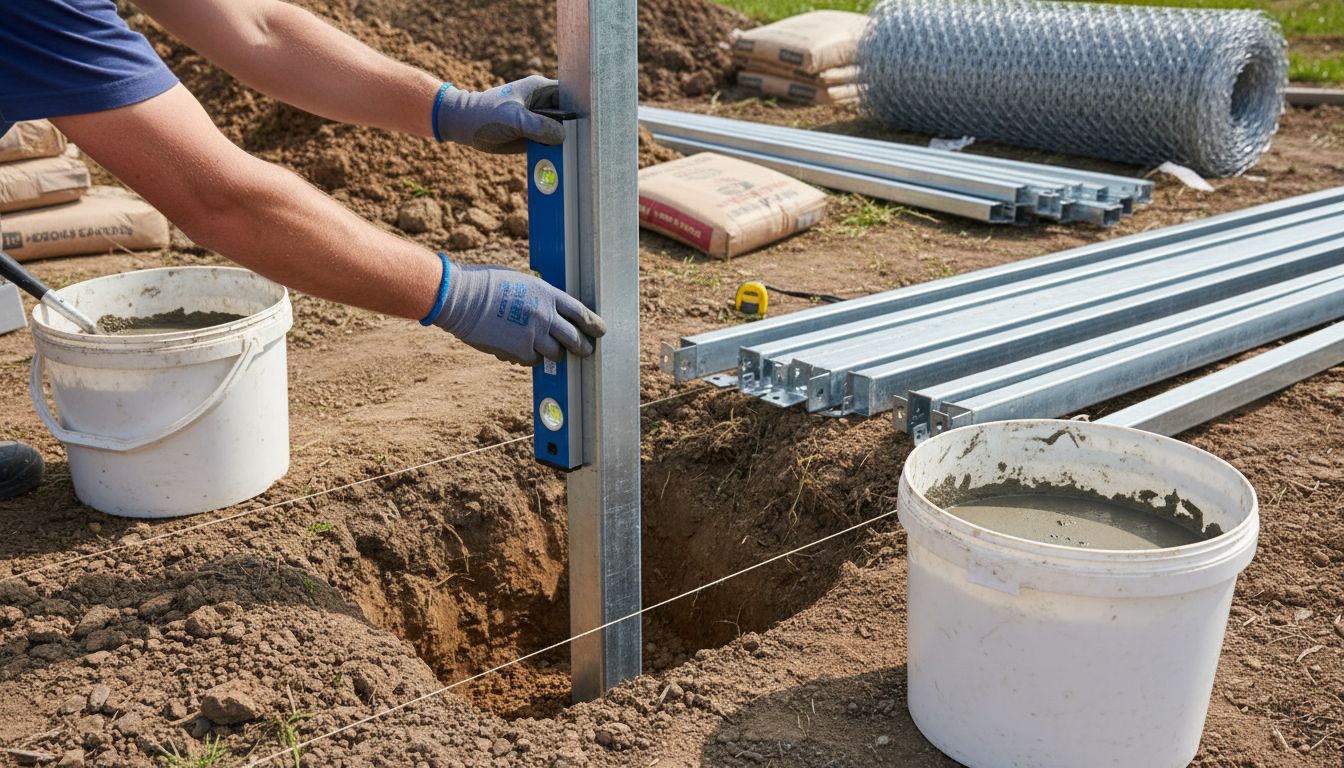
Step 3: Install fence posts securely
Installing fence posts forms the critical structural backbone of your industrial security fencing project. This step demands precision and attention to detail to ensure long-term stability and performance.
Research from Clear View Fence Africa reveals that security fence posts come in various sizes including 60 x 60 mm and 80 x 80 mm options. Select post dimensions that match your specific security requirements and terrain conditions.
Begin by digging post holes approximately 600 mm deep and 300 mm in diameter. The depth ensures robust anchoring and prevents potential ground movement. Maintain consistent hole spacing typically between 2.5 to 3 meters depending on your specific fence design. Use a spirit level to confirm each post will be perfectly vertical during installation.
For maximum durability, opt for hot-dip galvanized posts which provide superior corrosion resistance. According to industry research, galvanized posts coated to standards like ASTM-123 and BS1722-14 offer exceptional longevity and weather protection. Fill post holes with a concrete mixture ensuring complete stabilization and allowing 24 hours for proper setting.
Pro Tip: Always wear protective gloves and safety glasses when handling posts and mixing concrete to prevent potential injuries.
Your precise post installation now sets the foundation for attaching fence panels and creating a secure perimeter. Next, you will focus on precise panel attachment and final structural reinforcement.
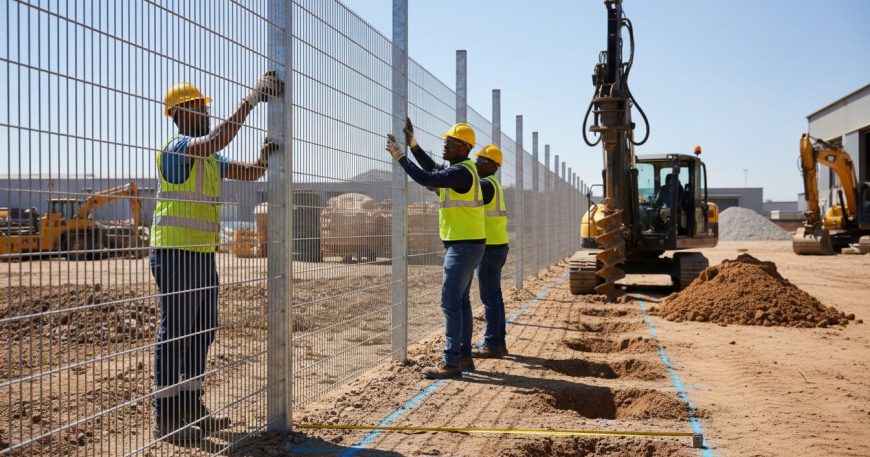
Step 4: Attach mesh panels or fencing material
With your fence posts securely installed, you are now ready to attach mesh panels the cornerstone of creating a robust industrial security barrier. This stage transforms your carefully prepared framework into a functional protective system.
Research from Clear View Fence Africa highlights that 358 security fences feature a specialized mesh size of 76.2×12.7 mm, offering maximum visibility and protection. These panels are ingeniously designed for installation on both flat and sloped terrains.
Begin by aligning your first mesh panel carefully against the installed posts. Secure the panel using robust welded or bolted connections. Professional installers typically use high tension clips or specialized brackets that provide consistent pressure and prevent potential panel movement. Pay close attention to maintaining straight vertical alignment and ensuring each panel sits flush against the adjacent sections.
Depending on your terrain, you might encounter uneven ground. Chain link fence research indicates these systems can accommodate various surface conditions through flexible installation techniques. Adjust panel placement methodically to maintain a consistent top line while allowing for ground contours. This might require slight trimming or careful positioning to achieve a professional finish.
Pro Tip: Always wear heavy duty work gloves and use mechanical lifting assistance when handling large mesh panels to prevent potential strain or injury.
Your mesh panel installation now creates a formidable security barrier. The next critical phase will involve adding final reinforcements and conducting a comprehensive quality inspection.
Step 5: Verify alignment and structural integrity
With mesh panels attached, your final critical task involves meticulously verifying the fence’s alignment and structural integrity. This comprehensive inspection ensures your industrial security barrier meets professional engineering standards.
Research from Clear View Fence Africa reveals precise tolerance requirements for security fencing. Sheet width and length must align within +/- 2mm, with mesh aperture maintained within +/- 0.5mm. These tight specifications demand careful measurement and systematic verification.
Begin by using a professional grade laser level to confirm horizontal and vertical alignment across all panels. Check that each section maintains consistent height and runs parallel to your property line. Measure the distance between posts to verify uniform spacing and structural symmetry. Use a high quality digital caliper to assess mesh panel connections and ensure they meet recommended tolerances.
Chain link fence installation research indicates that precise tensioning and secure fastening are paramount for maintaining long term structural integrity. Systematically test each panel connection by applying moderate pressure and checking for any movement or weakness. Modular clamping fixtures can eliminate welding requirements and promote easier installation verification.
Pro Tip: Photograph your completed installation from multiple angles as documentation for potential future maintenance or warranty claims.
Your thorough alignment verification now completes the critical installation phases. The final steps will involve adding any additional security features and conducting a comprehensive site walkthrough.
Step 6: Finish installation and clean up site
With your industrial fence installation nearly complete, the final stage involves meticulous site cleanup and documentation. This crucial phase ensures a professional finish and prepares your security barrier for long-term performance.
Addressing site-specific challenges such as terrain and accessibility is essential to achieving a clean and professional installation. Begin by removing all construction debris including excess concrete, metal offcuts, and loose soil around your newly installed fence.
Carefully inspect the entire perimeter for any remaining installation materials. Smooth out disturbed ground areas and restore the landscape as closely as possible to its original condition. Use a rake to level ground near post installations and remove any excess gravel or concrete spillage. Collect and properly dispose of all waste materials following local environmental guidelines.
Research from technical standards indicates the importance of proper documentation. While this guidance relates specifically to electric fencing, the principle of maintaining installation records remains valuable for all security fencing projects. Photograph the completed installation from multiple angles and compile a comprehensive site report documenting key installation details.
Pro Tip: Keep installation photographs and documentation for potential future maintenance or warranty purposes.
Your meticulously completed fence installation now stands as a robust security barrier. The final recommendation is to schedule a professional inspection to validate the installation and ensure complete compliance with local security standards.
Enhance Your Site Security with Expert Industrial Fencing Solutions
Struggling to design and install an industrial fence that meets stringent security standards while adapting to challenging terrain is a common concern explored in our guide. You know the importance of selecting strong materials like hot-dip galvanized posts and durable mesh panels that require precise installation to guarantee long-term stability and protection. At Jumalu Tech, we understand the critical need for fences that offer anti-climb and anti-cut features with unobstructed visibility to safeguard your property without compromising aesthetics.
Discover how our specialised ClamberPrufe Clear View Fencing systems can transform your industrial site with professional installation services. Backed by expert craftsmanship and compliance with local standards, we deliver security fences designed for high durability and ease of maintenance. Explore our detailed Clearview Fence Installation offerings and consider custom options through our Gate Manufacturing solutions to complete your perimeter protection. Don’t wait until vulnerabilities arise. Visit https://jumalutech.co.za today and request a quote to secure your site now.
Frequently Asked Questions
How do I assess site requirements for industrial fencing installation?
To assess site requirements, thoroughly examine your property’s physical characteristics including terrain variations, existing structures, and access points. Walk the entire perimeter and document any obstacles to create a detailed site map that highlights these features.
What materials should I consider for my industrial fence?
Select the right materials based on your project’s security needs and terrain conditions. For instance, hot-dip galvanized posts offer superior corrosion resistance and durability, making them ideal for long-lasting installation.
How deep should I dig post holes for an industrial fence?
Post holes should be approximately 600 mm deep and 300 mm in diameter. Digging to this depth ensures strong anchoring to prevent movement and maintains the structural integrity of your fence.
What steps should I take to mark fence lines accurately?
Use landscape marking spray or string lines to clearly indicate your fence boundaries. Measure multiple times to ensure precise placement before starting any ground preparation, which will help maintain alignment throughout the installation.
How can I verify the alignment of my installed fence?
To verify alignment, use a professional-grade laser level to check horizontal and vertical alignment across all panels. Measure the distance between posts for uniform spacing to ensure everything meets installation specifications.
What should I do after finishing the fence installation?
After installation, conduct a thorough cleanup of the site by removing all debris and restoring the landscape. Document your completed installation with photographs and notes for future maintenance or inspections.
Recommended
- Industrial Fencing Requirements in South Africa – Jumalu Fencing
- Fencing Installation Services: Ensuring Maximum Security From Day One – Jumalu Fencing
- Understanding the Definition of Mesh Fencing – Jumalu Fencing
- Commercial Fencing Explained: Types, Features, Costs – Jumalu Fencing
- Construction Fence Printing Services London | Promo Signs LTD
- Step-by-Step Baby Gate Installation on Tile, Concrete, and Banisters | Baby Safety Gates